
By Daily Carry Lab. Primary documentation checked October 14, 2026 (Pacific).
Affiliate disclosure: As an Amazon Associate, Daily Carry Lab earns from qualifying purchases. Retailer links may earn a commission at no extra cost to you. Manufacturer links support the documented claims.
Research disclosure: We have not tested these products. Selection is based on primary documentation and the compatibility decisions below; no DCL ratings or measured performance are claimed.
A webcam belongs in a travel kit when the laptop’s own camera cannot give you the framing or connection setup you need. Choose Logitech Brio 300 for a documented USB-C connection and a fixed 70-degree diagonal view. Consider Anker PowerConf C200 A3369 when choosing among 65, 78 and 95 degrees through its software matters more. We selected these two because their primary documentation identifies the connection, privacy cover and controls; we have not compared their image quality.
Start with the computer’s data port
Brio 300 connects through USB-C. The C200 setup guide shows a USB-C to USB-A cable connecting the camera to the computer. Check which end goes into the camera and which into your laptop; a USB-C socket on a camera does not establish that the supplied cable plugs directly into a USB-C-only computer. Logitech Brio 300, Anker setup guide.
Use a data-capable connection. If an adapter or hub is required, establish the complete path before packing: computer, adapter, cable and camera. A charging-only cable does not establish a working webcam path. Our laptop accessories guides covers the wider port decision; check the webcam directly on the laptop first to isolate a hub problem.
| Documented capability | Brio 300 | PowerConf C200 A3369 |
|---|---|---|
| Video specification | 1080p at 30 fps; 720p at 30 fps | Advertised 2K; no frame-rate equivalence assumed here |
| Framing | 70-degree diagonal field of view | 65, 78 or 95 degrees selected through AnkerWork |
| Supplied connection path | USB-C to computer | USB-C to USB-A cable in manufacturer setup guide |
| Physical lens cover | Rotating privacy shutter | Built-in privacy cover |
| Software distinction | Logi Tune; unavailable for ChromeOS | AnkerWork needed for configurable features |
Sources: Logitech specifications and embedded technical data, C200 product FAQ, C200 setup guide.
Resolution is a ceiling, not the meeting result
Logitech documents 1920 × 1080 at 30 fps. Anker advertises 2K for C200. Those labels describe camera capabilities, not a promise that a meeting application transmits that mode. Select the external camera in the application, examine its preview and make a short call before departure. Check the account and application settings if the available mode differs from the camera’s specification.
Neither a larger resolution number nor an automatic light-correction feature establishes better low-light detail in this comparison. We have not measured that. For a practical starting point, arrange the light and camera position so the preview is usable before buying an extra accessory.
Framing can matter more in a hotel room
A narrower view can help limit the background; a wider option can include another person or more of a workspace. C200 offers three selectable views through AnkerWork. That is a useful configuration choice, not a claim that a 95-degree view makes every small room suitable for a meeting. Inspect what appears behind and beside you before joining.
Brio 300’s 70-degree diagonal specification is fixed in this guide’s comparison. Diagonal and horizontal angles are different measurements; do not compare an unspecified seller angle with this number as if they are identical. If you need to switch framing frequently, confirm how the exact application and camera software behave together.
Check clip fit and the screen’s movement
Both setup guides show placing the webcam on a display. They do not establish a universal maximum screen thickness or a guaranteed fit on every thin laptop lid. Position the clip as shown, avoid pressing on the display panel, and check that moving the lid does not pull the cable or tip the camera. Keep the hinge, built-in camera and any screen cover clear.
Close each physical privacy cover between calls. A closed lens cover obstructs the camera; it does not establish that the microphone is muted or that software permissions have been revoked. Use the application’s microphone controls separately. Brio setup guide.
Check operating-system and software requirements separately
Logitech lists Windows 10 or later, macOS and ChromeOS in the captured compatibility data, with Logi Tune unavailable for ChromeOS. Anker’s C200 FAQ lists Windows 7/8/10/11 or macOS 10.13 and above for the camera, while the same page says AnkerWork requires macOS 10.14 and above. A supported basic video path therefore does not establish identical software features on every computer. We do not extend these statements to Linux, phones or tablets without exact host evidence.
| Choice | Budget status checked October 14, 2026 | Useful reason | Drawback to resolve |
|---|---|---|---|
| Brio 300 Graphite, retailer SKU 960-001497 | Current checkout total unknown | USB-C connection, 1080p/30 and physical shutter | Fixed framing; Logi Tune unavailable on ChromeOS |
| C200 A3369 black | Current checkout total unknown | Software-selectable framing and built-in lens cover | Supplied host end is USB-A; software requirements differ from camera requirements |
| Keep the laptop camera | No new camera purchase if it meets the need | Least extra cable and packing | Its angle and documented modes may not meet your setup |
Retailer identity checks cover Brio 300 Graphite B0BNN95XYL and C200 A3369 B09MFMTMPD. The Logitech listing identifies 960-001497; do not silently substitute a different regional SKU, Brio 4K or a renewed listing. Check the selected variant and contents again before buying. Product-photo reuse permission remains unverified.
Check Brio 300 mounting and cable clearance as one system
Before buying an extra stand or adapter, check whether Brio 300’s attached USB-C cable and hinged mount work with the laptop you will carry. Logitech’s setup guide, English pages 3–6, checked October 22, 2026, identifies a primary rear mounting hinge, a front tilt hinge and a foot hinge for monitor-angle adjustment. These are separate adjustments; pushing harder on the screen is not the documented fitting method.
| Step in the documented setup | What to inspect on your laptop | Purchase consequence |
|---|---|---|
| Open the arm and place the camera on top | Front tab sits snug against the screen front | Confirm the mount position before adding another support |
| Bring the arm toward the back of the display | Adjust the foot hinge for the display shape | A thick or unusual lid needs an actual fit check |
| Tilt the camera forward or backward | Frame your face without pulling the cable | Changing the lid angle may require another check |
| Plug the attached USB-C lead into the computer | Port location and available cable route | Do not plan around swapping a detachable camera cable |
Logitech recommends a direct computer connection instead of a USB hub where possible. Start there when establishing that the webcam works, then check any required hub separately. A compatible connector on a hub alone does not prove the complete connection or mounting arrangement works.
The guide also recommends Logi Tune for periodic software and firmware updates. If a managed work laptop limits software installation, resolve that with the administrator before relying on a new setup. This is preparation advice, not a claim that Tune is mandatory for basic video or that an unapproved installation is permitted. Retain the ChromeOS software limitation above.
Our suggested packing check is to disconnect the USB lead, remove the webcam and protect the attached cable without straining it. We have not measured hinge retention, cable endurance or compatibility with your display. Current stand, adapter and replacement-camera prices are unknown. Choose extra hardware only after identifying an actual fit or port problem; these Brio instructions do not establish the C200’s hinge or cable arrangement.
Evaluate the C200 audio path before adding a separate microphone
C200’s built-in microphone deserves a separate setup check from the picture. Anker Japan’s model-specific FAQ, dated October 18, 2022, retrieved October 24, 2026, describes changing microphone directionality in AnkerWork’s audio settings. Its microphone advice recommends speaking within 3m and keeping firmware updated. That is manufacturer guidance from a dated regional document, not a measured pickup radius or a current software-menu guarantee.
| Setup question | Check before buying more equipment | Remaining drawback |
|---|---|---|
| Which microphone is the call using? | Select the intended input in computer and meeting settings | Selecting the C200 camera alone does not settle audio routing |
| Can you change pickup behavior? | Confirm current AnkerWork controls and installation permission | An old menu description may differ from today’s software |
| Do you need audio privacy? | Use microphone mute and application permissions separately | Anker explicitly says the mic can work with the privacy cover closed |
| Does a normal call sound adequate? | Rehearse at the intended position and listen back | Manufacturer advice does not predict your room’s acoustics |
The FAQ’s software section lists firmware and audio configuration functions. Before relying on them on a managed laptop, confirm that installation and updates are permitted. We have not verified the present app version, a regional SKU’s complete feature parity or particular pickup-angle values, so this update adds no numeric directionality claim.
Our suggested comparison is to try the existing permitted microphone path first: laptop, headset or C200. Identify an actual audio requirement before expanding the bag with a separate microphone, interface or adapter. This is a planning recommendation, not evidence that C200 sounds better than those alternatives.
Budget and drawback: current delivered accessory totals are unknown. A software setting cannot establish adequate sound in every room or remove every background noise. DCL has not tested intelligibility, processing artifacts or privacy behavior. Keep the physical lens cover and microphone controls as separate decisions throughout setup and pack-down.
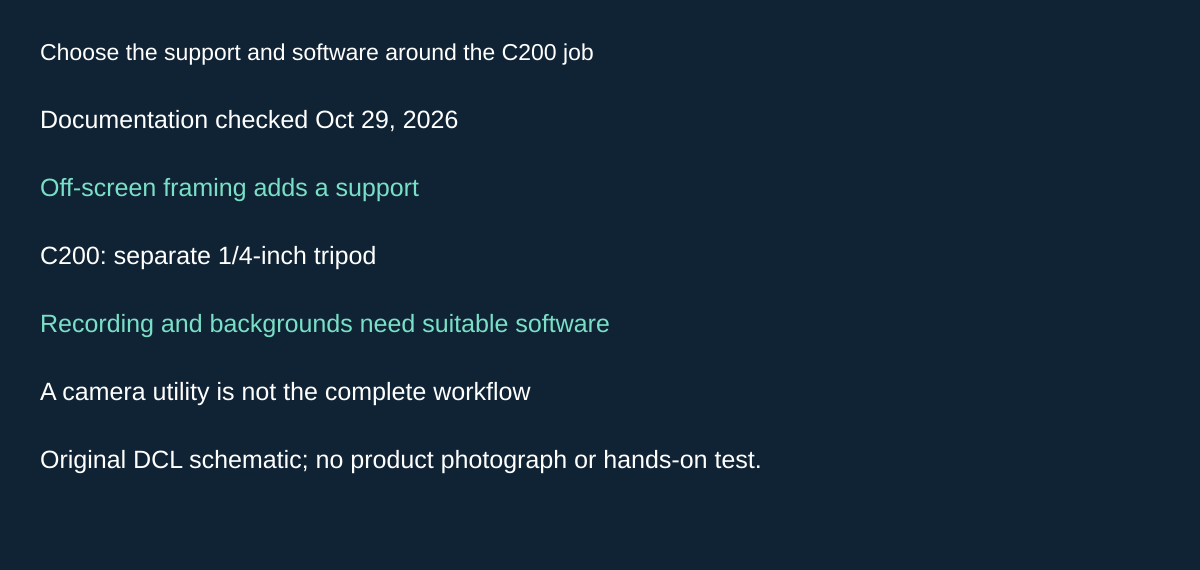
Original DCL research schematic, October 29, 2026; documented boundaries, not a product photograph or test.
Choose the support and software around the C200 job
Moving the camera off the laptop can solve a framing constraint, but it adds a support decision. Anker Japan’s C200 FAQ documents mounting the folded clip on a separately sold tripod with a 1/4-inch screw. The same dated FAQ says AnkerWork does not itself provide video recording or virtual backgrounds, directing readers to suitable separate software. C200 FAQ, October 18, 2022, retrieved October 29, 2026. Treat this as dated regional documentation and confirm current software before buying.
| Intended job | Evidence to obtain | Extra piece or limitation |
|---|---|---|
| Put the camera beside the screen | Compatible 1/4-inch support with suitable clearance and stability | Tripod is separate; thread size alone does not prove the whole arrangement |
| Record a local presentation | A permitted recording application and selected camera/microphone | Do not assume the configuration utility is the recorder |
| Hide the room background | Supported meeting or background software | Check the actual application, account and computer |
| Buy for face sign-in | Exact supported authentication hardware | Anker’s FAQ says C200 does not support Windows Hello |
Start with the task rather than collecting accessories. If the screen-mounted position works, another stand may add packing without improving the result. If an off-screen angle is essential, check cable reach and the support’s own instructions as well as the camera mount. We have not tested stand retention, authentication, recordings or background replacement.
For a managed work laptop, establish permission to use the needed software before choosing the camera. A USB video feed and a configurable utility are different from a complete authorized presentation workflow. Verify the intended recording location and microphone path with a short disposable sample before relying on the kit.
Budget and drawback: tripod, adapter, software and complete-kit prices are unknown. This dated source does not establish current application menus, subscription eligibility, universal support fit or Brio 300 tripod compatibility. Preserve the port, lens-cover and separate microphone-privacy checks above.
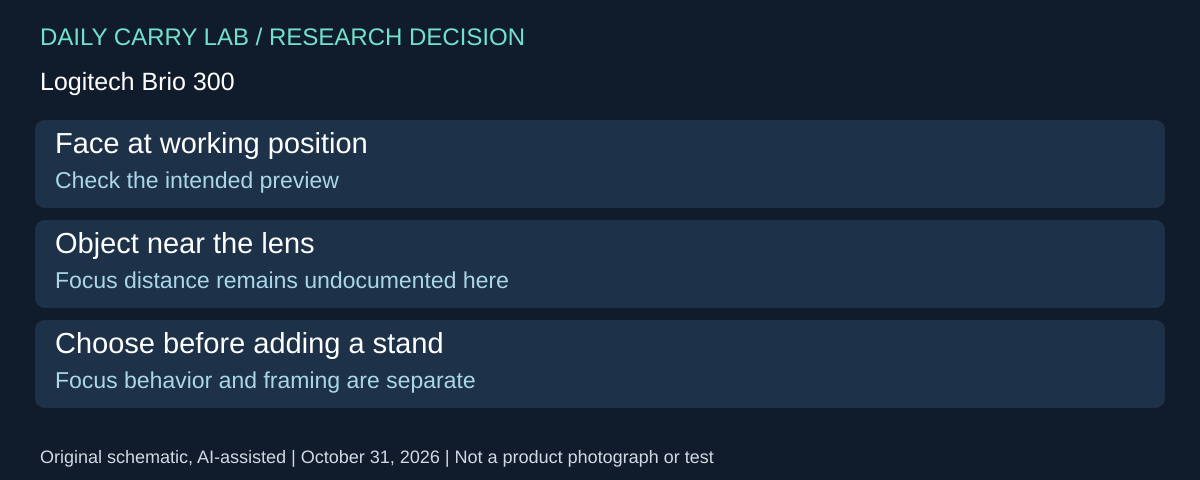
Choose focus behavior for the subject you show
A fixed field of view and fixed focus are different purchase checks. Logitech’s Brio 300 support specification, checked October 31, 2026, explicitly identifies fixed focus. The earlier 70-degree framing comparison does not establish autofocus for a moving subject.
| Intended subject | Check before choosing | Unresolved limitation |
|---|---|---|
| Seated face | Preview at the working position | No DCL sharpness or low-light measurement |
| Small object held toward the camera | Check legibility at the intended distance | The source gives no minimum focus distance |
| Alternating face and desk demonstration | Require documented focus behavior for both positions | Moving the mount does not establish refocusing |
For a practical check, show the actual kind of label, connector or handwritten note the meeting needs to see. A readable face preview alone does not answer that requirement. This is our preparation advice, not a test result or a claim that Brio 300 necessarily fails close work.
Selection and budget: keep the existing camera if its preview meets the task. Otherwise investigate an explicitly documented alternative before buying another support. Camera and stand totals are unknown. This source establishes no focus behavior for C200, and no software setting is claimed to convert fixed-focus hardware into autofocus.
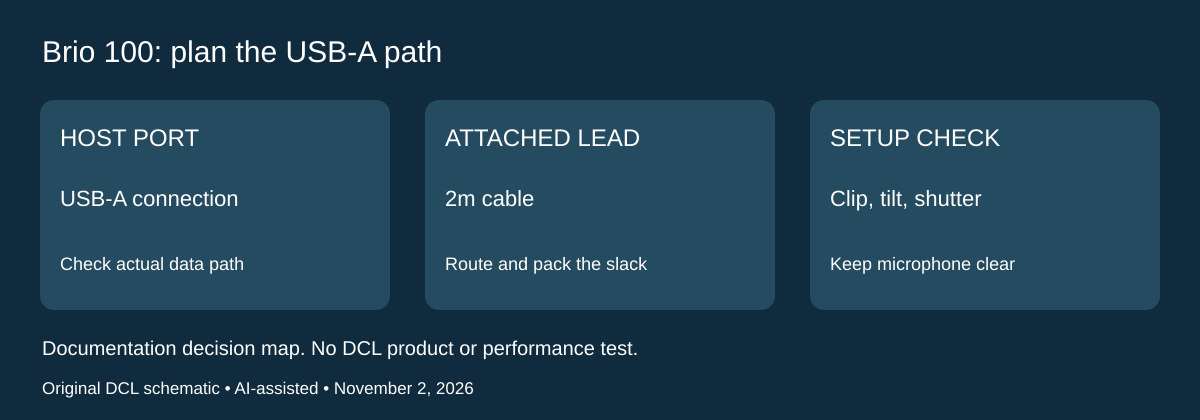
Brio 100: compare a native USB-A path with the USB-C options
Research added November 2, 2026. A laptop with a free USB-A data port presents a different connection decision from one with only USB-C. Logitech Brio 100 adds a documented USB-A alternative to the retained Brio 300 and C200 comparison. Select by the actual port and mounting arrangement before treating a higher-resolution label as an upgrade.
The Brio 100 setup guide, English pages 3–5, identifies a 1080p/30fps lens, built-in microphone, privacy shutter and mounting clip. Its package list specifies a webcam with an attached 2m USB-A cable and documentation. The connection diagram plugs that cable into the computer’s USB-A port. This is not a detachable USB-C cable kit.
| Your connection or packing need | Documented Brio 100 arrangement | Drawback to resolve |
|---|---|---|
| Free USB-A computer port | Attached USB-A connection | Verify the intended computer and app requirements |
| USB-C-only laptop | Guide does not supply a direct USB-C connection | Account for a separately qualified data path; no adapter is approved here |
| Small desk or light bag | Attached 2m lead | Extra reach also means cable to route and pack |
| Laptop-mounted calls | Clip against the rear of the display; manual tilt | Check actual display clearance and stability |
The maker’s setup sequence places the clip’s end flush with the back of the device, then adjusts vertical framing by tilting the camera. That gives an owner a concrete setup check, rather than evidence that it fits every thin screen, case or monitor. We have not measured clip force or tested display movement. Compare the occupied port, rear clearance and cable route as one arrangement.
The guide also shows the microphone beside the lens. It instructs opening the shutter fully so the microphone remains uncovered, and explains that the LED indicates application use. Treat the cover and the app’s selected audio input as separate checks; this update does not establish that covering the lens mutes audio. Before an important call, inspect framing and confirm the chosen microphone in the actual meeting setup. These are suggested reader checks, not DCL call tests.
Budget and drawbacks: current webcam, data-adapter and complete-kit prices are unknown. A USB-A option can be relevant when it uses a suitable port already available, but it is not automatically the cheaper or lighter setup. Keep an existing camera if it already meets framing and connection needs. The guide’s box list does not authenticate a seller’s color, condition or accessory bundle, and this update adds no retailer mapping. DCL has not compared image quality, microphone quality, app compatibility or privacy performance in hands-on use.
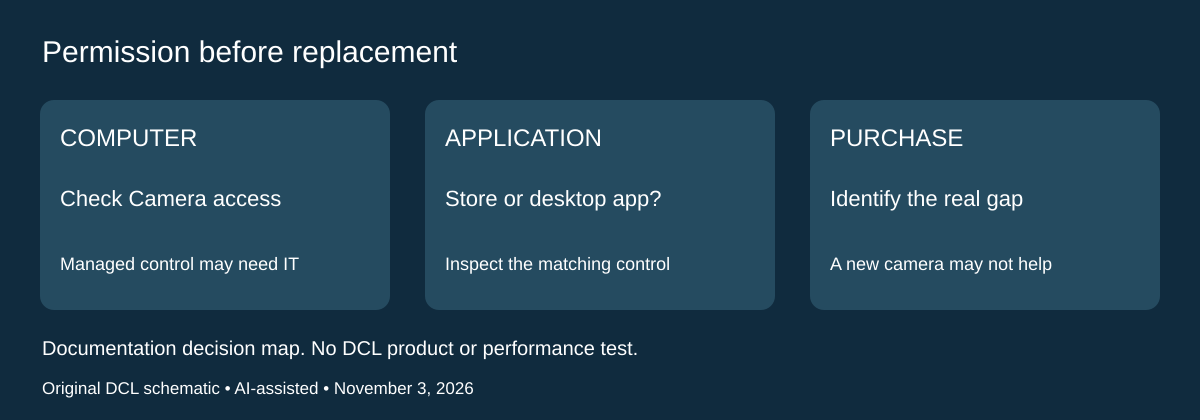
Check Windows camera permission before buying another webcam
A supported USB connection and a visible webcam in the kit do not establish that a Windows meeting app may use it. Microsoft’s camera-permission instructions, checked November 3, 2026, separate device-level camera access, Store-app access and desktop-app access. Check the layer relevant to your actual meeting software before treating a dark preview as a reason to buy another camera.
| Windows 11 checkpoint | What Microsoft’s instructions establish | Limit for the purchase |
|---|---|---|
| Settings, Privacy & security, Camera | Camera access controls whether users can allow apps access | A disabled control may need an administrator |
| Microsoft Store application | Enable app access and inspect that app’s listed control | One allowed app does not establish permission for another |
| Desktop meeting app or browser | Inspect Let desktop apps access your camera | An absent individual app listing does not alone show unsupported hardware |
Microsoft’s current support page says desktop-app camera privacy controls cannot be set individually through that page and notes exceptions in how desktop apps appear or access the camera. Treat it as access troubleshooting, not a complete privacy audit or a universal description of every Windows build. If your settings differ, use current support for that computer rather than assuming that the guide’s menu names override its configuration.
For a managed travel laptop, our suggested pre-purchase check is to record the Windows version, intended app, required camera mode and whether the relevant setting is changeable. Check the physical privacy cover too. Then evaluate the permitted camera path in the intended app. DCL has not run that check with Brio 300, Brio 100 or C200; OS permission does not validate focus, framing, resolution, microphone quality or a model-specific software feature.
Selection and budget: replacing one compatible USB camera with another should follow an identified hardware or feature gap. A blocked permission can leave both purchases unusable in the same app. Current delivered webcam and adapter totals remain unknown. Use an administrator’s approved route when controls are managed; do not purchase a second camera on the assumption that it bypasses the restriction. If the existing camera meets the job once access is correctly configured, keeping it preserves bag space and avoids an unneeded accessory. This is a decision method, not a promised repair or measured saving.
Shop the researched models
These Amazon links are affiliate links. Daily Carry Lab may earn a commission from qualifying purchases. Match the model and included contents to your needs; this guide is based on manufacturer-source research, without hands-on testing.
-
Logitech Brio 300 (graphite, 960-001497)
Check Logitech Brio 300 (graphite, 960-001497) on Amazon -
Anker PowerConf C200 (A3369)
Check Anker PowerConf C200 (A3369) on Amazon
Sources and limits
This guide compares published specifications and source documentation. Daily Carry Lab has not performed hands-on tests of the products in this guide. Consult the dated sources and verify the exact model and current terms before buying.
- brio primary documentation
- brio-manual primary documentation
- c200-uk primary documentation
- c200-manual primary documentation
- Evaluate the C200 audio path before adding a separate microphone primary documentation
- Choose focus behavior for the subject you show primary documentation
- Logitech Brio100 Setup Guide English pages3–5: identity, included lead, mounting and shutter
- Windows11 Camera access, Store/desktop app controls, administrator and privacy exceptions
Related guides
Portable document scanners: choose the feed, power and file workflow
Compare Epson ES-50 and ES-60W simplex workflows with discontinued Brother DS-740D duplex limits, USB power and current software checks.
USB-C Ethernet adapters: match the host, driver and network rate
Compare TP-Link, Plugable and Belkin INC012 Ethernet adapters by host connector, link rate, tether reach and complete kit. Research; throughput untested.
Single-port 65W laptop chargers: profiles, plugs and cable limits
Compare Anker A2663 and Supertiny 65W for one USB-C laptop, including PPS evidence, plug variants and cable limits.
E Ink note-taking tablets: Scribe, reMarkable or BOOX?
Compare exact Kindle Scribe, reMarkable Paper Pro and BOOX Go10.3 Gen II models by pens, file export, lighting and subscription limits.